General hardness (GH) and carbonate hardness (KH) are two of the most misunderstood water parameters. Here is what they do, why they matter for fish health a...
Freshwater aquarium guidance
Choosing Aquarium Hardscape: Driftwood and Rocks
Learn how to pick, source, prep, and arrange driftwood and rocks safely so your freshwater aquascape looks natural, stays stable, and won’t harm fish or water chemistry.

Written by
Oliver Bennett
Oliver Bennett is a lifelong aquarist with over 15 years of experience in freshwater tank setup, aquascaping, and fish health. Through TankRoot, he shares his passion for creating balanced underwater ecosystems, helping hobbyists of all levels build thriving, beautiful homes for their fish.
Published: October 17, 2026
•
Updated: October 17, 2026
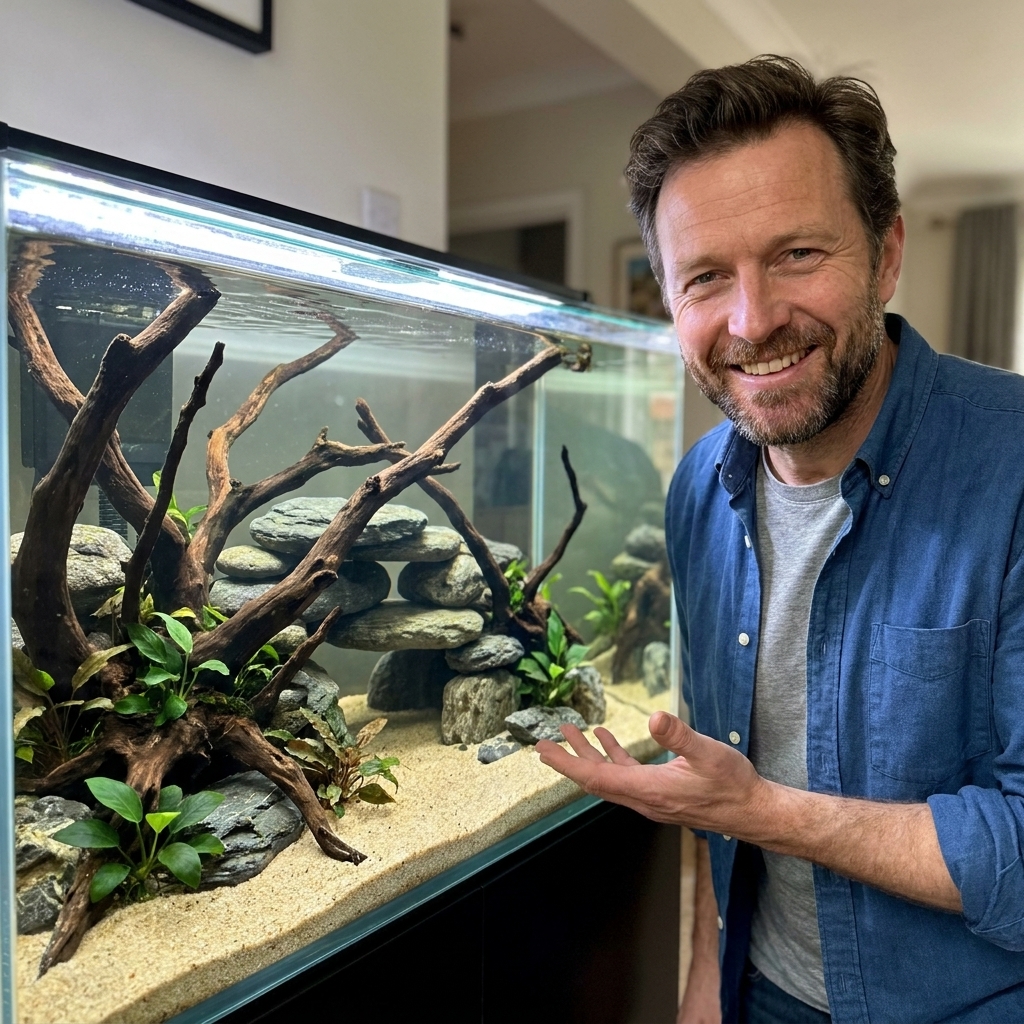
Hardscape is the skeleton of your aquascape. Before plants fill in and fish claim territories, driftwood and rock decide what your tank will feel like, how flow moves, and whether your layout stays solid for years or shifts the first time you gravel-vacuum.
I still remember building my first “serious” aquascape and watching a pretty stack of stones slowly settle into the substrate until it pressed against the glass. Nothing cracked, but it taught me an early lesson: hardscape is not just decor. It is structure, chemistry, and safety all at once.
What hardscape does in a freshwater tank
- Creates structure and depth: Hard lines and shadows make small tanks look larger and more natural.
- Defines fish behavior: Caves, sight breaks, and ledges reduce stress and aggression in many community fish.
- Anchors plants: Wood and stone give epiphytes (Anubias, Java fern, Bucephalandra) a place to attach, and they help hold slopes in place.
- Influences water parameters: Some rocks raise hardness and pH. Many woods release tannins that tint water and can nudge pH downward in low-KH setups, but they do not reliably lower GH.
- Changes flow: Your filter output will move differently once it hits a wall of wood and rock. That can be good for distributing CO2 and nutrients, or bad if it creates dead spots.
Driftwood basics: types, benefits, and risks
Common aquarium-safe woods
You do not need to memorize brand names, but it helps to know what you are buying. These are widely used in freshwater aquariums:
- Mopani wood: Dense, sinks faster than most, often releases lots of tannins at first. Great for bold centerpieces.
- Manzanita: Hard, branchy, dramatic shapes. Often arrives dry and may float for a while.
- Spider wood (often sold as azalea root): Thin, root-like branches, beautiful for “tree” layouts. Tends to grow biofilm early on.
- Malaysian driftwood: Usually sinks readily, more subdued shapes, common in stores.
What driftwood does to water
Most aquarium wood leaches tannins. Tannins can:
- Turn water tea-colored (blackwater look).
- Nudge pH downward in some tanks, mostly when your KH is low. If your tap water is high-KH, wood usually will not meaningfully change pH.
- Provide a more natural environment for many fish, particularly tetras, rasboras, and many dwarf cichlids.
If you want crystal-clear water, you can still use wood. You just need to prep it well and consider running activated carbon for a short period while tannins taper off. Many aquarists also use Purigen for this.
Common driftwood “problems” that are usually normal
- White fuzz (biofilm): A soft, white or translucent film often appears on new wood. It is typically harmless and usually disappears in a few weeks. Shrimp, snails, and some fish will graze it.
- Floating: Some pieces need weeks of soaking before they waterlog. You can weigh them down temporarily or attach them to slate.
Real red flags
- Soft, punky wood that crumbles: Avoid it. It will break down quickly and can foul water.
- Unknown outdoor branches: Even if they look perfect, they can contain pesticides, sap, or rot. Stick with aquarium-sold wood or properly identified, pesticide-free hardwoods you can confidently prep.
- Resinous woods (pine, cedar, etc.): Avoid. Resins and oils can be irritating or toxic.
Rock basics: choosing stone that will not sabotage your parameters
Rocks that tend to be aquarium-friendly
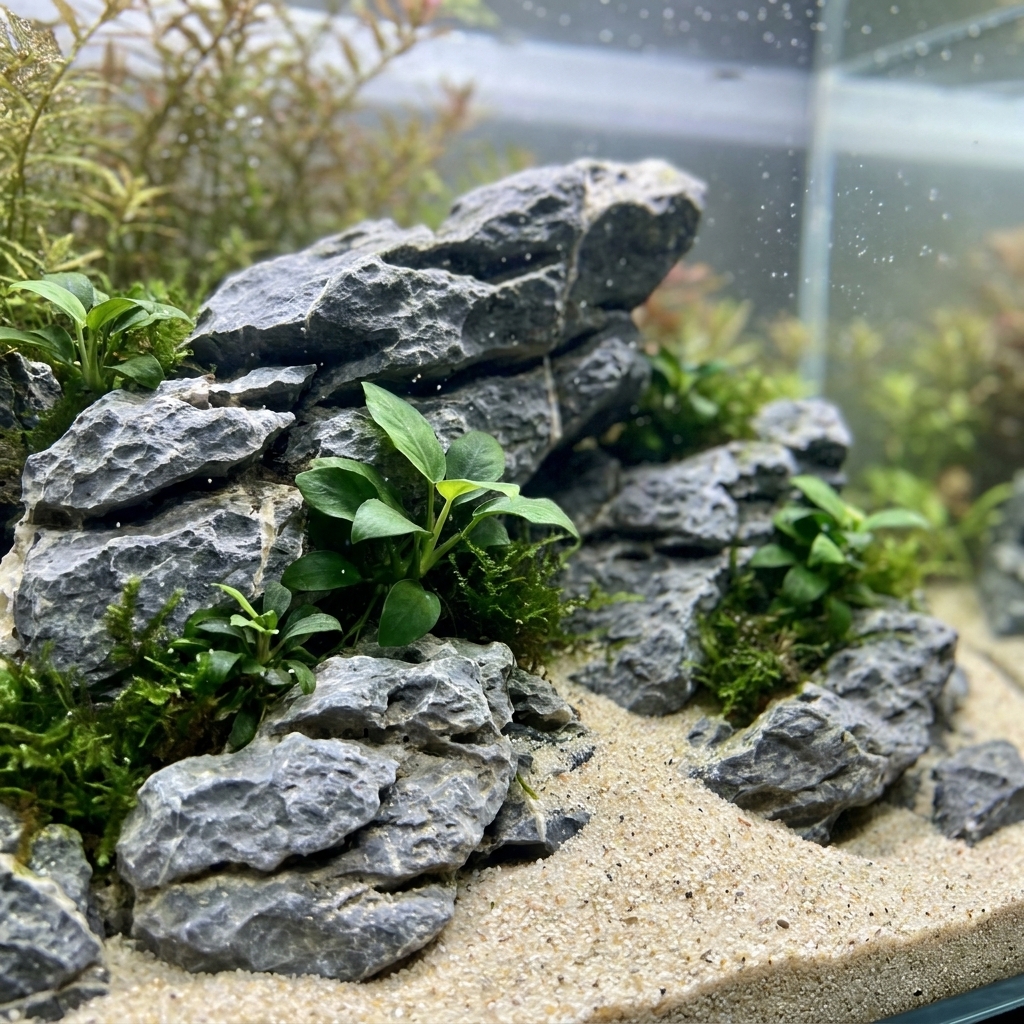
- Seiryu stone: Iconic in aquascaping, sharp ridges and contrast. Note: it often raises KH and GH and can push pH upward over time. The effect varies by batch and is most noticeable in soft, low-KH aquariums.
- Dragon stone (Ohko): Lightweight, holey texture, great for planting. Usually more inert than Seiryu, but always test.
- Lava rock: Porous, lightweight, excellent for beneficial bacteria and for supporting slopes. Rinse well, it can be dusty.
- Slate: Flat layers, useful for caves and bases under wood. Can have sharp edges.
- River stone: Smooth, rounded. Nice for natural stream beds, but harder to stack securely.
Rocks that often raise hardness and pH
As a beginner, the biggest surprise is how often a “pretty rock” is basically slow-release hardness. The usual culprits are limestone, marble, dolomite, coral rock, aragonite, and many shells.
These are not “bad” rocks. They are perfect if you keep livebearers, African cichlids, or other hard-water fish. They are a headache if you are aiming for soft, acidic water.
Quick home tests for reactive rock
No single test is perfect, but these two cover most beginner situations:
- Vinegar test: Drip white vinegar onto the dry rock. If it fizzes, it likely contains calcium carbonate and can raise KH. No fizz is not a guarantee the rock is inert. Some carbonate rocks show little or no reaction with vinegar.
- Stronger acid test (with caution): If you have access to a stronger acid like muriatic acid, it is more sensitive than vinegar. Use gloves, eye protection, and do this outdoors. If that sounds like overkill, skip it and choose known aquarium stones instead.
Even if a rock seems fine at first, it can still slowly affect water. If you are keeping sensitive soft-water fish, monitor KH, GH, and pH weekly after adding new stone.
How to source hardscape safely
Best sources for beginners
- Reputable aquarium stores: You pay more, but you get known materials.
- Aquascaping shops online: Great for specific stones and large statement pieces.
- Local landscape rock yards: Often the best value for large stones, but you must identify what you are buying and clean it thoroughly. Ask what the rock is called and whether it is limestone-based.
Sourcing from outdoors: proceed carefully
Wild-collected materials can work, but they carry more unknowns. If you are determined to collect:
- Avoid areas near roads, farms, golf courses, or anywhere herbicides and runoff are likely.
- Choose hard, non-crumbling rock and fully dead, cured hardwood with no sap.
- Expect hitchhikers. Wild hardscape can bring in algae, snails, spores, and tiny invertebrates. Time, soaking, and careful observation are your best tools.
- Never take from protected lands or waterways where collecting is illegal.
Prepping driftwood the right way
Step 1: Scrub and inspect
Use a stiff brush under running water to remove dirt and loose bark. Avoid soaps and detergents. Check for soft spots and flaking rot.
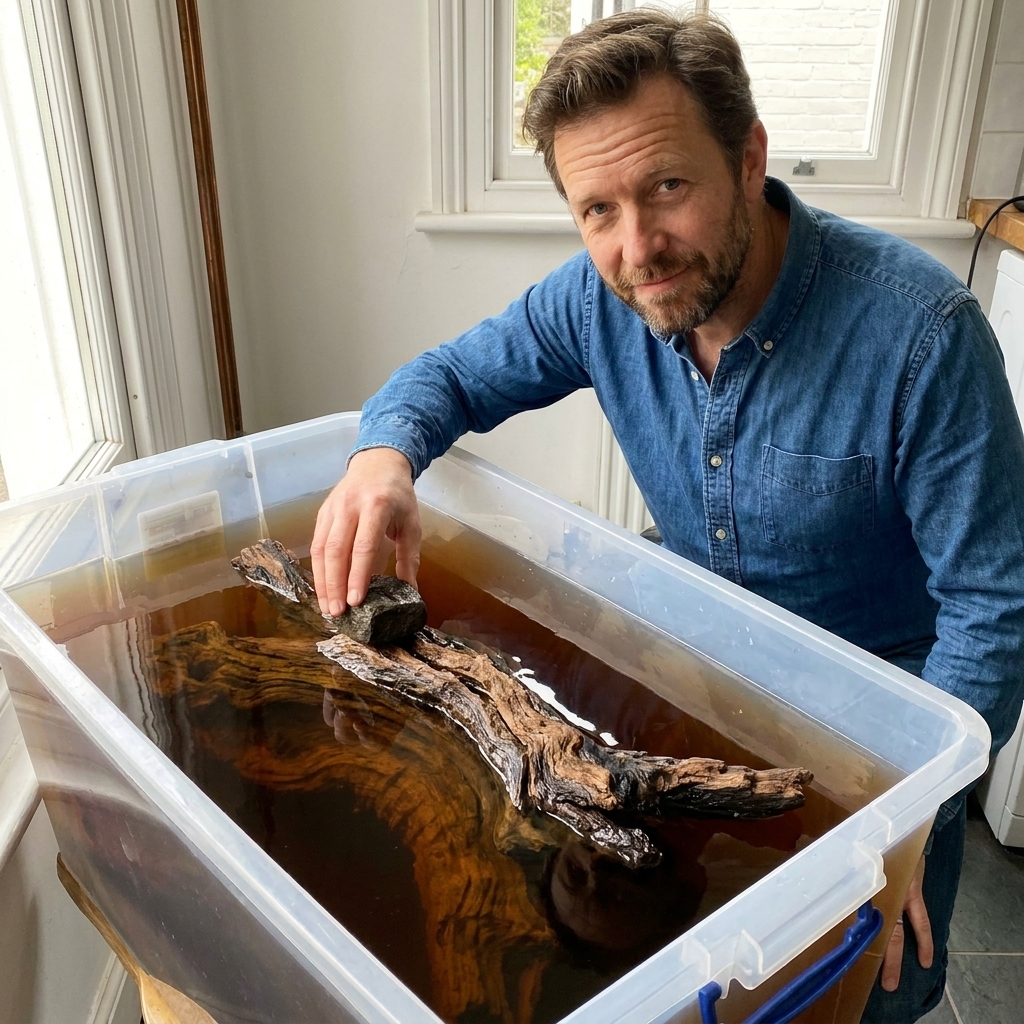
Step 2: Decide if you will boil, soak, or both
- Boiling (when possible): Speeds up tannin release and helps kill hitchhikers. Boil 1 to 2 hours if the piece fits. Let it cool fully before handling.
- Soaking: For large pieces, soak in a clean tub or bucket. Change water every day or two at first. This helps waterlog the wood and reduces tannins. If boiling is not practical, soaking plus time is the safe fallback.
Some woods stain water for weeks even after boiling. That is normal. If the look bothers you, keep soaking and do extra water changes after the hardscape goes in.
Step 3: Make it sink
If your wood floats, you have a few options:
- Soak longer.
- Wedge it under rocks temporarily.
- Attach it to slate or acrylic using stainless steel screws (grade 316 is preferred) or aquarium-safe epoxy.
Avoid “just burying it deeper.” Wood that wants to float will eventually lift your substrate and plants with it.
Prepping rocks without making a mess or a hazard
Cleaning
- Rinse thoroughly to remove dust and grit.
- Scrub with a brush. For stubborn dirt, you can use hot water.
Avoid these common mistakes
- No soap: Detergents can soak into porous rock.
- Be cautious with bleach: Bleach can be used to disinfect rock in rare cases, but it must be fully dechlorinated and dried. Beginners usually do not need it if the rock is clean and from a safe source.
- Do not boil rocks: Some rocks can trap moisture and crack or even pop when heated. Plenty of aquarists still do it, but the risk is real, especially with porous or layered stones.
Edge check
Run your fingers over edges. Sharp stone can tear fins, especially on long-finned fish like bettas and fancy guppies. You can reposition sharp points away from open swimming lanes or lightly sand edges if needed.
Designing a layout that looks natural
Pick a concept before you buy
Beginners often buy a random piece of wood and a random bag of stones, then try to force them into a “scape.” It is much easier to decide on a simple concept first:
- Island: Hardscape clustered in the center, open sand around it.
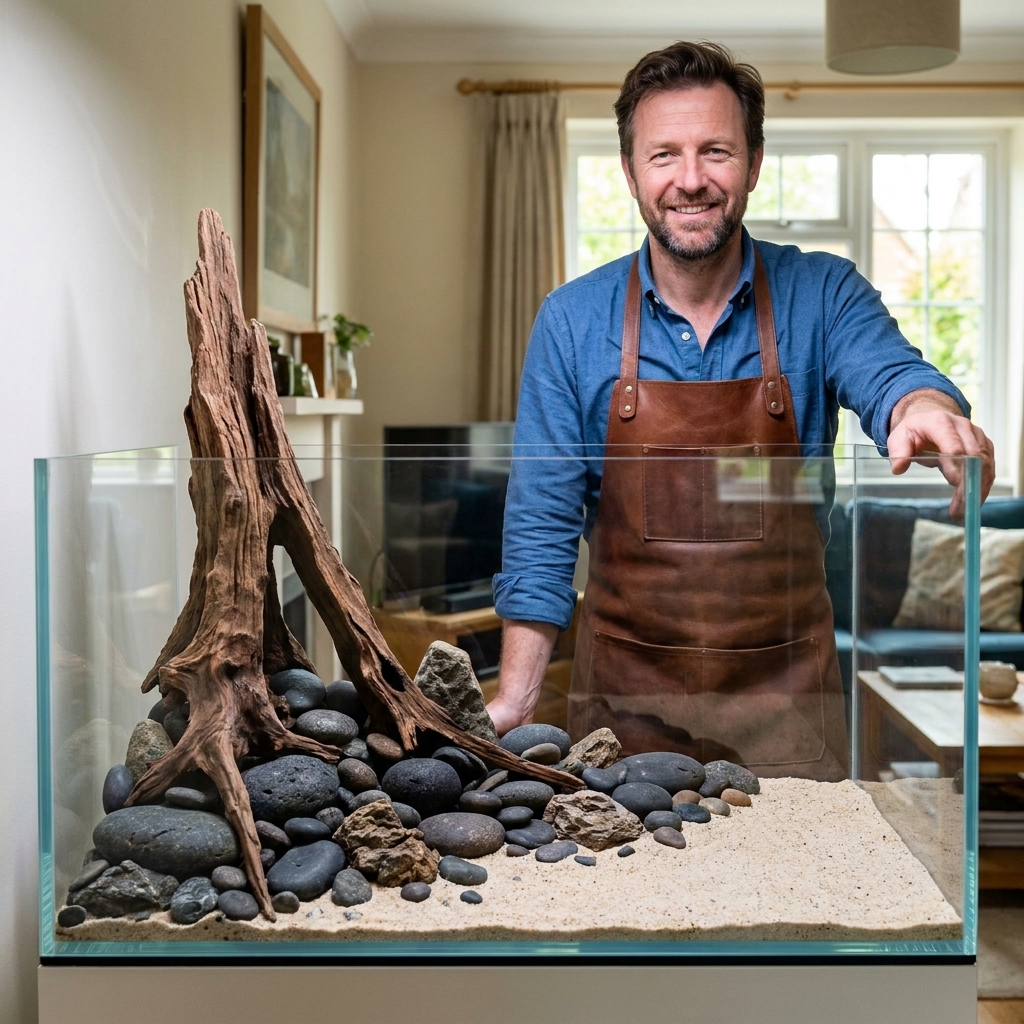
- Triangle: Tall on one side tapering down across the tank. Classic and forgiving.
- Valley: Two hardscape masses with an open path between them. Great depth, but needs planning.
Choose a hero piece
One standout piece of wood or one main stone group should lead the eye. Everything else supports it. This single decision prevents the common beginner look where every item fights for attention.
Use scale and repetition
- Use larger stones than you think you need. Small rocks disappear once plants grow in.
- If you use stone, try to stick mostly to one rock type. Mixing three different stones often looks accidental.
- Angle wood and stone in similar directions to create flow and cohesion.
Building it stable: protecting fish and glass
Rule 1: Hardscape goes on the bottom
Place rocks and wood directly on the tank bottom or on a protective layer, then add substrate around it. Sand shifts. Soil settles. If your rock pile is sitting on a soft base, it can tilt over time.
Prevent point pressure and scratches
Most damage comes from point loads and dragging heavy rock across the glass. A few habits help:
- Place hardscape before filling the tank, and lower rocks straight down instead of sliding them.
- Set heavy stones gently, and avoid twisting them once they are in contact with the glass.
- Use a base layer to spread weight in rock-heavy layouts.
Use a base layer when stacking rock
To spread point pressure and reduce risk:
- Aquarium foam leveling mat under the tank is helpful overall.
- Egg crate light diffuser (cut to size) can distribute weight under rock-heavy layouts.
- Thin acrylic sheet under the rock zone can also work.
Any base should be fully covered by substrate so it does not show.
Lock stones together
- Test your stack dry first, then replicate it in the tank.
- Use aquarium-safe super glue gel with cotton or tissue as a filler for quick bonds.
- Use aquarium-safe epoxy putty to create strong hidden braces, especially for overhangs.
Leave maintenance access
That perfect cave is less perfect when you cannot siphon behind it. Leave small gaps for flow and cleaning, or plan to use a turkey baster to blow debris out during water changes.
Pairing hardscape with fish and plants
Fish considerations
- Territorial fish: Dwarf cichlids, gouramis, and many barbs benefit from sight breaks and multiple cave options.
- Bottom dwellers: Corydoras prefer smooth sand and gentle transitions. Avoid sharp rubble where they sift.
- Plecos and wood: Many plecos graze on biofilm and benefit from wood surfaces, and some species rasp wood as part of their diet.
Plant choices that love hardscape
- Epiphytes: Anubias, Java fern, Bucephalandra. Attach to wood or rock, do not bury rhizomes.
- Mosses: Java moss, Christmas moss. Tie or glue to branches and rock faces for a mature look.
- Rooted plants: Crypts, swords, stems. Use hardscape to create terraces and planting pockets.
Tannins, clarity, and parameter swings
If your water turns tea-colored
Tannins are usually cosmetic. If you like the blackwater vibe, enjoy it. If you do not:
- Do a few extra partial water changes the first couple weeks.
- Run activated carbon temporarily, or use Purigen.
- Be patient. Most woods calm down with time.
If your pH rises after adding rock
Test KH and GH, not just pH. If KH is climbing, the stone is likely carbonate-based. Options:
- Remove or replace the rock with inert stone.
- Keep the rock and choose livestock that thrives in harder water.
- Avoid chasing pH with chemicals. Stability beats a perfect number.
Beginner hardscape shopping checklist
- Pick one main wood or one main rock group as your focal point.
- Stick mostly to one stone type for a cohesive look.
- Vinegar test unknown rocks, and remember that “no fizz” does not prove a rock is inert.
- Scrub everything with water only.
- Soak or boil driftwood to reduce floating and heavy tannins.
- Build hardscape on the tank bottom, then add substrate around it.
- Lower rocks carefully and avoid dragging them on glass.
- Check for sharp edges and unstable overhangs.
- Plan for cleaning access and flow paths.
FAQ
Can I use rocks from my yard?
Sometimes, but only if you can confidently identify the rock and it has not been exposed to pesticides or runoff. Test with vinegar, scrub thoroughly, and monitor KH and GH after adding it. When in doubt, buy known aquarium stone. It is cheaper than fixing a tank-wide parameter problem.
Is driftwood safe for all fish?
Generally yes, but consider the environment your fish prefer. Tannin-stained, slightly softer water suits many tetras and rasboras. Hard-water livebearers can still do fine with wood, but if your KH is high, wood usually will not pull pH down in any meaningful way.
What is the white slime on my new driftwood?
That is usually biofilm. It is common on fresh wood and typically harmless. Shrimp and snails often eat it, and it fades as the tank matures.
Do I need to glue rocks together?
If you are stacking, yes is often the safest answer. A stable layout protects fish and prevents rocks from shifting into the glass. For simple single stones placed flat on the bottom, glue is optional.
Should I hardscape before or after filling the tank?
Before. It is easier to test stability, set angles, and place substrate cleanly when the tank is empty or only partially filled.
The calm way to start
If you are new to aquascaping, keep it simple: one great piece of wood, a handful of matching stones, and a layout you can clean without disassembling the tank. A stable, natural hardscape is the kind of foundation that makes everything else easier, from planting to algae control to fish confidence.
Get the bones right, and the tank practically builds itself from there.